What It Actually Takes to Care for a Dog After Surgery

Bringing a dog home after surgery feels like a lot of responsibility. You’ve just been handed a stack of discharge papers, a bag of medications, and a dog who is groggy and uncomfortable. The good news is that post-surgical care at home is very manageable once you know what to expect.
Most of the work happens in the first few days. After that, recovery settles into a routine of monitoring, restricting activity, and keeping up with medications. This guide walks you through each stage so you can feel prepared rather than anxious.
In This Article
- What to Expect When You First Bring Your Dog Home
- Setting Up a Recovery Space
- Managing Activity Restrictions
- Caring for the Incision Site
- Medications: What to Give and When
- Eating and Drinking After Surgery
- How Much Post-Surgery Care Actually Costs
- Signs That Healing Is on Track and Signs to Call Your Vet
- Follow-Up Appointments and Suture Removal
- Pet Insurance
What to Expect When You First Bring Your Dog Home
The first few hours after discharge are usually the quietest. Anesthesia takes time to fully clear the system, and most dogs are sleepy and a little unsteady on their feet. This is normal. Let your dog rest in a quiet area and avoid hovering too closely; your presence is reassuring, but your dog mostly needs sleep.
Some dogs are nauseated after anesthesia and may not want food or water right away. Offer small amounts when they show interest, but don’t be concerned if they skip the first meal. Appetite typically returns within 12 to 24 hours. If your dog vomits once or twice in the first few hours, this is not unusual. If vomiting continues into the next day, call your vet.
Pain medication given at the clinic will carry your dog through the first several hours at home. Check your discharge instructions to see when the first home dose is due, and set a reminder so you don’t miss the window. Consistent pain management in the first 48 hours makes a meaningful difference in comfort and the speed of recovery.
Setting Up a Recovery Space
Having a dedicated recovery space ready before your dog comes home makes the first days after surgery easier. The space should be low to the ground, easy to access, and away from household traffic and other pets. A crate with soft bedding works well for most dogs. A gated section of a room is another good option if a crate isn’t practical.
Remove anything your dog could climb onto, such as furniture, dog beds with raised sides, and steps. For dogs recovering from orthopedic surgery in particular, jumping onto and off a couch or bed is one of the most common ways a repair is disrupted in the first two weeks. It takes only a moment and can significantly set recovery back.
Non-slip surfaces matter too. Hardwood floors can be slippery for a dog with limited mobility, which increases the risk of falls. Yoga mats, rubber-backed rugs, or carpet runners in high-traffic areas help your dog move safely when they need to get up for water or go outside.
Managing Activity Restrictions
Activity restriction is the part of recovery most owners find genuinely difficult, especially with energetic dogs who bounce back faster than their bodies are ready for. The restriction isn’t about how your dog feels; it’s about allowing the internal repair to complete without being disrupted by movement.
Most post-surgical dogs are on leash-only outdoor trips for bathroom breaks during the early recovery period. “Leash only” means a short walk to the yard and back, not a stroll around the block. Running, jumping, playing with other dogs, and stairs are typically off-limits for 2 to 8 weeks, depending on the procedure.
Mental enrichment can help dogs who are frustrated by limited physical activity. Food puzzles, lick mats, sniff work from a lying position, and calm training exercises give your dog something to engage with without stressing the healing area. Short, structured activities are far better than allowing your dog to find their own entertainment.
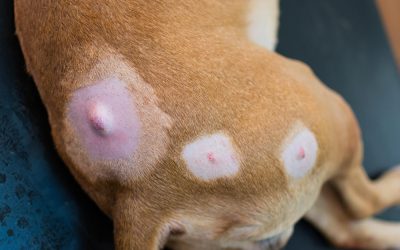
Caring for the Incision Site
Check the incision once a day, ideally at the same time, to track any changes. A healing incision should look a little pink and closed in the first few days, with mild swelling that gradually reduces. Slight bruising around the edges is also normal and not a sign of trouble.
What you don’t want to see is increased redness spreading outward from the wound, warmth or firm swelling, discharge that is yellow or green, a foul smell, or sutures that look pulled or missing. Any of these warrants a call to your vet rather than a wait-and-see approach.
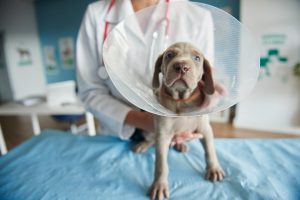
The biggest threat to a clean incision is your dog. Dogs will attempt to lick, bite, or scratch at a wound given any opportunity. An e-collar (the cone) is the standard solution and should stay on whenever your dog is unsupervised. Alternatives like recovery suits or inflatable collars exist, but they only work if the incision is located somewhere they genuinely block access. When in doubt, the cone is the more reliable option.
Do not apply any creams, hydrogen peroxide, or home remedies to the incision unless your vet has specifically directed you to. Clean, dry, and undisturbed is the ideal state for a healing wound.
Medications: What to Give and When
Most dogs go home with at least two medications: a pain reliever and an antibiotic. Some also receive anti-nausea medication or a sedative to help with rest and confinement. Your discharge instructions will specify the dose and schedule for each one.
Complete the full course of antibiotics even if your dog seems back to normal before they’re finished. Stopping early is one of the more common mistakes in post-surgical care and can allow an infection that wasn’t fully cleared to develop. If your dog refuses the medication or shows any sign of a reaction, such as vomiting, hives, or facial swelling, call your vet before skipping the next dose.
Pain medications for dogs are calibrated to their weight and the type of surgery. Do not supplement with human over-the-counter pain relievers such as ibuprofen, acetaminophen, or aspirin. These are toxic to dogs and can cause serious harm even at small doses. If your dog seems uncomfortable between doses, contact your vet about adjusting the pain management plan rather than adding something from your medicine cabinet.
Eating and Drinking After Surgery
Reduced appetite on the day of surgery is expected. Offer a small, bland meal in the evening, plain boiled chicken and rice is a standard recommendation, and don’t worry if your dog isn’t interested right away. Fresh water should be available at all times, but allow your dog to approach it rather than encouraging them to drink large amounts at once.
Normal appetite usually returns within 24 to 48 hours. If your dog is still not eating by the second day, let your vet know. In most cases, this is still just a residual anesthetic effect, but it’s worth flagging so your vet can rule out other causes.
Some medications, particularly anti-inflammatory pain relievers, should be given with food to reduce stomach irritation. Your discharge instructions will note whether this applies. If your dog skips a meal but needs medication, a small amount of a soft treat or a spoonful of plain food is usually enough to buffer the dose.
How Much Post-Surgery Care Actually Costs
Typical post-op expenses:
- Pain medications: $30-$100+, depending on the size of the dog and the length of treatment
- Antibiotics: $20-$60 for a typical course
- Anti-inflammatory medications: $30-$80 per month if needed long-term
- Cone or protective gear: $15-$50 (more if you try multiple types)
- Follow-up appointments: $50-$100 per visit, multiple visits required
- Suture removal: Sometimes included, sometimes a $40-$80 separate charge
- Physical therapy: $50-$100 per session, often 8-16 sessions needed
- Additional diagnostics if complications arise: X-rays ($150-$400), bloodwork ($100-$300)
VCA Hospitals notes in their overview of surgical aftercare costs that post-operative expenses typically add 15-30% to the total cost of surgery. For a $3,000 ACL repair, you might spend an additional $500-$900 on post-op care if everything goes smoothly.
Signs That Healing Is on Track and Signs to Call Your Vet
Knowing what normal recovery looks like helps you spot problems early. Most dogs follow a fairly predictable pattern: quiet and slow on days one and two, slightly more alert by day three or four, and noticeably more themselves by the end of the first week. Energy and appetite both trend upward as the week progresses.
Signs that healing is going well:
- Incision looks closed, dry, and the surrounding swelling is reducing
- Appetite is returning, and your dog is drinking normally
- Your dog is resting comfortably and not showing signs of constant pain
- Urination and bowel movements have resumed (may take 24 to 48 hours post-surgery)
Call your vet if you notice:
- The incision is opening, leaking discharge, or has a foul smell
- Swelling is increasing rather than decreasing after the first 48 hours
- Your dog has not eaten in more than 48 hours post-surgery
- Your dog has not urinated within 24 hours of coming home
- Pain seems to be increasing rather than improving as days pass
- Your dog is excessively lethargic, pale, or breathing abnormally
Most of these situations are manageable when addressed promptly. Calling your vet’s office with a question is always the right call when something feels off.
Follow-Up Appointments and Suture Removal
Most surgeries include at least one follow-up appointment, typically seven to fourteen days after discharge. This visit lets your vet assess how the incision is healing, check that any internal repairs are holding, and remove external sutures if used. Don’t skip this appointment even if your dog seems completely fine. The visual and physical examination catches things that are easy to miss at home.
Suture removal is a quick, low-stress visit in most cases. Internal sutures dissolve on their own and don’t require removal. If your dog had skin staples, those are typically removed at the same appointment. Your vet will confirm that healing is complete and give you updated guidance on when activity can gradually resume.
For orthopedic surgeries, follow-up may involve imaging to confirm bone or ligament healing before activity is cleared. This is standard practice and not a cause for concern; it simply confirms that the repair is solid before your dog starts putting more demand on it.
How Can Pet Insurance Help You if Your Dog Needs Treatment?
Pet insurance can be a valuable tool in managing the costs of treating a dog’s veterinary expenses. By having a pet insurance policy in place, you can have peace of mind knowing that you can provide medical care for your furry companion without worrying about the financial burden. Pet insurance can help cover the costs of veterinary consultations, diagnostic tests, medications, and even specialized treatments if required.
Reimbursement
This method is the most common for pet insurance companies. You pay out of pocket for the veterinarian bill, and then the insurance company reimburses you for what’s covered under the insurance plan. The steps look like this.
- You pay the vet bill after your dog’s visit.
- You fill out the pet insurance claim form.
- Submit the claim form and other required documentation to the insurer.
- After the claim is approved, you will be reimbursed for eligible expenses.
What Does Odie Pet Insurance Cover?
Pet insurance covers various veterinary expenses, providing financial protection and peace of mind for pet owners. Here are the details of the coverage options offered by Odie Pet Insurance:
Illness & Injury Insurance
The Illness & Injury Plan is an all-inclusive insurance plan designed to cover a wide range of medical needs for your pet. This plan includes comprehensive coverage for various illnesses, injuries, and veterinary services. Some of the covered items include:
- Veterinary exams and consultations
- Diagnostics (e.g., X-rays, lab tests)
- Prescribed medications
- Surgeries and hospitalization
- Rehabilitation, acupuncture, or chiropractic treatments
- Medically necessary supplies
The Wellness Plan
The Wellness Plan is a monthly membership that focuses on preventive care and covers routine veterinary services.
- Provides reimbursements for routine care items such as wellness visits (exams and vaccines), testing and parasite prevention, dental cleanings and at-home dental care, vitamins, supplements, and more.
- Through Odie’s partnership with Petivity, a leader in smart pet products and proactive care, Wellness Plan members can also receive reimbursements for Petivity devices and health kits, as well as eligible Purina food and supplements.
- Total reimbursement up to $700 per year.